 As a gardener, Spring is a wonderful time of the year. This is because you can shake off the winter blues and get yourself ready for another gardening season. However, spring gardening can be difficult because you are probably impatient. You do not want to start digging up the dirt too early or you may […] The post Time for Spring Gardening appeared first on All around the house. from http://allaroundthe.house/time-for-spring-gardening/
0 Comments
 Decorating a living room by changing colors and updating accents can give it an entirely new look and feel, and surprisingly, a living room can go from ordinary to extraordinary in one afternoon. Contrary to popular belief, it does not take a lot of money to begin decorating in unique and stylish ways. Consider the […] The post Ideas for Decorating a Living Room on a Budget appeared first on All around the house. from http://allaroundthe.house/budget-living-room-decorating/  Pretty much anyone can look around their home and see the little things that need improved, repaired and remodeled. Not all of us want to spend days and days on a single project. Some of us want to tackle the little things that can help improve the value of our home and not cost a […] The post 10 Cheap and Easy Ways to Improve the Value of Your Home appeared first on All around the house. from http://allaroundthe.house/increase-home-value/  Everyone wants to upgrade their home at some point. The biggest question that often makes us think twice before going for home improvement is the budget. Check out: Tight Budget Home RepairsIt’s one of the top reasons holding people back from carrying out home improvement projects, the second being knowledge, and that is why you’re here on All Around the House! But, we are here to help you out with cutting costs of repairs as well. 6 Home projects to take on, that won’t break the budget
One of the best ways of making your home look luxurious yet without spending bucks is with inexpensive decorative items. You can make your space look impressive with the help of curtains, fancy cushion covers, table covers, and many more things. Check Out: Bedroom Makeover Ideas for People on a BudgetEnsure that it matches up with the wall color. You can also add an adorable family picture for a striking look.
Frequently people hesitate to renovate their floors, as it is often assumed to be costly. Why not invest in the kind of flooring that’s durable and long lasting? Check Out: Wood Flooring, All You Need to KnowAnd when it comes to the durability nothing lasts more than wood flooring. It might be a little costly but think of it as a long-term investment into your dream home. Amidst the wooden flooring, there are various options available like parquet flooring, reclaimed oak flooring, bamboo flooring, and many more. Wood floors not your thing? Check Out: Carpeting 101
Addition of mirrors on the wall will make the room larger, when done in the right locations. It’s an excellent option for small rooms or tiny homes. You can arrange mirrors above the fireplace, inside the living rooms, bathrooms, dressers, and other places. You can decor the mirror with wonderful colors that match up with the interior of the room.
One simple home improvement tip can bring liveliness inside your home. Stenciling is one of many ways. It’s easily available in the nearby store. Simply get it and then paste it on the wall. You can also use it on the fabrics and the furniture.
Another affordable and applicable home improvement tip is to renovate the old furniture. To give a fresh look to your home, you can begin with by updating the upholstery. Shift the furniture from one room to the other to change your interior style. Moreover, you can also think of painting it with colors or maybe covering it with patterned fabric.
Last but not least, paint your home. It’s the simplest yet effective way of making your home look majestic and luxurious. Check Out: Paint; Easy Do it Yourself RepairsAlso, try to utilize what you have. Find out from your storage room things and remove the dust. Moreover, see whether they go with the interior. Sometimes people buy furniture that is not compatible with the interior. Hence, think twice and make the most of with what you have.
So, that was all about six tips you must follow for the development of home in an affordable yet applicable way. If you like the blog, then do share, drop your thoughts and suggestions in the comment section. AUTHOR BOX: Tom Collins is an interior designer with years of experience. He is a certified wood flooring specialist and part-time writer. In his free time, you shall often find him doing gardening and writing new articles, tips, and recommendations related to wood flooring. Tom has worked with the The New & Reclaimed Flooring Company. The post Check Out These Affordable Home Improvement Tips appeared first on All around the house. from http://allaroundthe.house/inexpensive-home-tips/  Would you like to give your kitchen a little face lift by installing new cabinets? Before you run out and invest a bunch of money on new kitchen cabinets consider these less expensive yet just as affective ways to update your kitchen cabinets.
Check Out: Choosing the Right Paint2. Change the hardware. Many of the major home improvement stores offer a wide variety of knobs, and hinges in different materials including porcelain, iron and bronze. Check Out: What Colors Suit Your Dwelling3. Removing the cabinet doors entirely. Referred to as open cabinets, this look will give your kitchen a more open feel. Be sure to fill in the holes where the hardware was attached and give the framing around the cabinets a fresh coat of paint. 4. Open kitchen cabinets with curtains. Choose the curtain of your choice or make your own for the perfect fit. There are droves of printed cloth to choose from. 5. Change the existing doors for glass ones. There are some truly beautiful glass doors available at a variety of home improvement stores. This will be a bit more expensive, but still, not nearly as much as installing brand new kitchen cabinets.
7. Add (if applicable) or change the molding along the top and sides of the kitchen cabinets. There are many different styles available. Just take measurements around the cabinets and along the sides if applicable so you are sure to purchase enough for the job. 8. Remove the existing paint, sand the kitchen cabinets and finish them with varnish, polyurethane or another clear-coat material. 9. Apply decals to the kitchen cabinets before putting on the clear-coat finish. Not quite the same as stencils, but just as affective for acquiring that updated look. Check out other ideas that can improve your kitchen decor in this post10. Believe it or not, simply cleaning your kitchen cabinets could brighten them up. Over time kitchen cabinets become covered with grease and food residue. Try brightening them up with a good cleaning before you invest in anything else. You just might be impresses with the end result. You don’t need to invest a lot of money or hire a professional to update your kitchen cabinets. With a little elbow grease and your imagination you can achieve the same thing with a lot less money. The post 10 Tips for Updating Your Kitchen Cabinets appeared first on All around the house. from http://allaroundthe.house/updating-kitchen-cabinets/  Begonias are a fun and enjoyable plant to have around your home. You can grow them indoors or outdoors, in low to bright light. Although some are fairly simple to take care of others can be not so easy to grow. Begonias also don’t always have a fragrance to them. So you may want to shop around if you are looking for the fragrant kind.
Tuberous begonias do much better in full sun, but still need to be watered quite often. This particular variety propagates better from cuttings. Although, if you are willing to take the time you can learn to grow these from seeds as well. Tuberous begonias can grow quite large. There are some variety of wax begonias that can grow rather large, too. But they tend to be smaller than their tuberous counterpart. The third type of begonias are the stemmed variety. These can either grow tall or short so don’t expect much from these, unless you are a seasoned gardener with this type of begonia. Pay close attention when choosing the stemmed begonia as they tend to be less disease tolerant than the others. They also do well as seed starters. Like the colors in the rainbow, you can find begonias in almost any color. Similar to tulips, although some may disagree, you can inadvertently change the color of the flowers by changing the ph balance of the soil they are in. This can happen simply by using tap water. A filtered watering system will protect them from mineral deposits. Begonias are best to be watered at the base of the plant than to water directly down onto them. Should you decide to grow your begonias in pots, make sure you are watering into the water drain pan to make the plants search for the water. If you have a watering can with a narrow spout, it would not hurt to water the plants at the soil level. Natural rain water does not seem to be such an irritant as tap water does. When watering, pay attention to the leaves. If they are yellowing, you are overwatering. Browning leaves mean that the plant is not receiving enough water.
Growing begonias indoors will require an east or west window for sunlight. Should you only have south windows, make sure the begonia is not right up next to the window. In fact, have it across the room where the window shines upon. North facing windows will need a plant light, unless of course you live in the southern hemisphere. Too much sun can be the death of your prized begonias. Where ever you plan to plant your begonias, research the variety you have and keep a journal if needed. These wonderful flowering plants can light up a home whether they be inside or outside. Amaze your friends as to how well you can take care of them. You can find more information on begonias online. Have fun with your gardening of begonias. The post Caring for Your Begonias appeared first on All around the house. from http://allaroundthe.house/begonia-care/  One of the handiest tools you can have around your home is a level. Just as the name implies, a level helps you make sure that things are level and straight. Whether you are mounting shelves or pictures on the wall or doing more serious construction projects, knowing how to use a level is a valuable skill to have. Laser levels are the newest innovation and have many benefits including being able to use and giving very true and accurate results. Although they are more expensive than other types, they can be a worthwhile investment and save you a lot of time and hassle with your projects. In this article we’ll discuss how to use bubble-type levels as well as laser levels.
No matter how many vials a particular level has, the way you use it is pretty much the same. To use it, you lay the level across the surface that you want to be sure is straight or hold it up parallel to it. If the bubble floats to one side or the other of the vial that means the surface is not level. If the bubble floats in the middle of the vial then the surface is level. To use the level, simply adjust the surface until the bubble floats in the middle. You’ll notice that the bubble always floats on the side that is too high. So for instance, if you are mounting a shelf and the right hand side is too low, the bubble will float on the left hand side of the level. That means you need to raise the right hand side of the shelf until the bubble is centered. Check out: How to Make and Use a Water Level
To use the laser level, position it where you need it and it will automatically find level and shoot out a straight, visible laser. You can buy a tripod to mount it on, use a wall mounting device or set it on a stable, hard surface. You can draw a line on the wall where the laser is hitting or drive screws in directly without drawing a line. If you don’t have a regular or laser level on hand, you can always use the old trick of putting a ball or other round object on the shelf or the top of the picture frame and adjusting it so that the ball doesn’t roll off. Taking the time to learn how to properly use a level can make all of your home improvement or DIY projects go faster and can also help you to get more professional looking results. The post How to Use a Level appeared first on All around the house. from http://allaroundthe.house/how-to-use-a-level/ 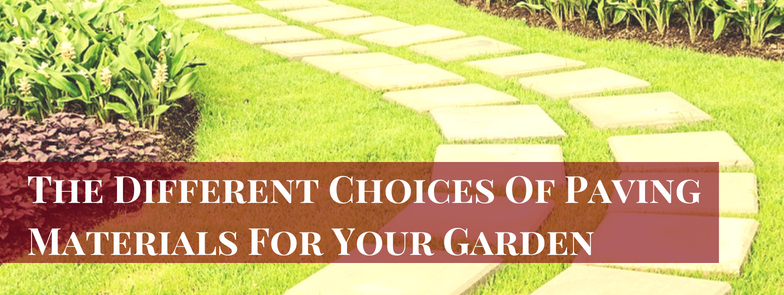
Listed Below Are Types Of Pavers Used for Garden Walks:
Check out: 3 Walkway Options for a Beautiful LandscapeBenefits of Different Pavers:
Paving contractors offering an option of stone pavers ensure multiple benefits. Stone is extremely strong and caters to the durability factor. This paving material does not flak, chip or crack easily. Besides this, the stone is one material, which can withstand the harsh summers or even the cold winters. In case of any damage, which is unlikely, all that is required is replacing that one specific stone. The well-reputed and experienced paving contractors can handle this replacement easily.
Stone is one material, which does not change color, nor does it collect any grime, thus making it a low maintenance choice. Finally, with the different options available in stone, making a choice in accordance to the requirement is easy.
Concrete paving products offered by the paving contractors are available in wide range of shapes, sizes, and colors. Many homeowners choose concrete due to the versatility it offers. You have an option of creating different patterns by the mix-and-match method. Specific paving contractors offer pavers, which are a traditional brick and the interlocking design offering your home a professional look. Concrete pavers being cost-effective can fit into most of the budgets. These can last up to nearly 30 years.
Repairing or even replacing works out affordable with these concrete pavers. For the maintenance of these pavers all that is required, is a routine sweeping and rinsing with the hose. Finally, concrete pavers provided by well-reputed paving contractors are slip resistant.
The limestone pavers are textured in a fine manner. The paving contractors offering this option ensure your garden gets a velvety finish. This is anytime a classy and elegant choice. This material is evenly colored, as compared to the granite or sandstone. The contractors can cut this into the required shapes with ease, as it has a fine grain.
Granite is one material, which is incomparable where the durability factor is concerned. The paving contractors dealing in these pavers offer granite pavers in brick shapes or cubes. As compared to the other paving stones, granite offers you a maximum number of choices in colors. As this material is a little difficult to handle, the paving contractors might charge a wee bit more. In other words, granite works well for those who have a flexible budget.
For easy selection among the various choice out of different pavers, you need to conduct an online search and find the best one for your paving needs.
Author Bio:
The post The Different Choices Of Paving Materials For Your Garden appeared first on All around the house. from http://allaroundthe.house/garden-pavers-guest-post/  A stunning display of springtime tulips takes some pre-planning. Plan the tulip bed in the fall, plant the tulip bulbs carefully and follow a few special tulip growing tips for a tulip garden that will bloom in the early spring. When to Plant Tulip Bulbs Since tulips flower in the early spring, they should be planted in the fall. Tulip bulbs need to have a cold, dormant period in order to develop and flower successfully in the spring. According to the North Carolina Cooperative Extension Services, spring-flowering bulbs, like tulips, should be planted when the soil temperatures are less than 60 degrees Fahrenheit or 16 degrees Celsius. Depending on location, this could be anywhere from late September to November.
|
ABOUT USHiking Camping World is the best place to learn about hiking and camping. Get all the guides to enjoy the outdoors. ArchivesNo Archives Categories |

 1. Give them a fresh coat of paint. Stick with soft, earthy colors like sage green or burnt orange; this will keep the cabinets fresh looking, without being overwhelming. Apply as many coats of paint until you achieve the depth of color you like.
 6. Stencil on them. Choose whatever pattern you like; leafs, apples, pumpkins, anything will do. Give your kitchen cabinets a fresh coat of paint prior to stenciling for a really new look.
 In most states, you will find people growing begonias on the east or west side of their homes. This is due to the fact that most Americans buy wax begonias which thrive well with about half a day’s sun, and not full sun. Many of the “care markers” say they will do well in full sun, but if you live where the temperatures can reach over 78 degrees then you will need to water these plants almost daily as the soil dries out quickly for them. Begonias love moist soil.
 Begonias can use some food (fertilizer) every two to four weeks. Growing begonias indoors may require feeding in as soon as ten days to two weeks. Soil composition breaks down faster in potted plants faster than it will outdoors. When growing plants in pots, keep track of the size of the plant so that it doesn’t become root bound. Once this happens, you need to repot the plant into the next pot size up.
 Regardless of the style of level, one characteristic that many levels share is the method in which they work. Typically they have a small vial filled with liquid with a small bubble in it. Depending upon the style of level there may only be one vial or there may be several. For instance, a torpedo level has 3 vials – one for making sure things are level, another for making sure things are plumb, and still another for measuring 45 degree angles.
 Laser levels work quite differently than traditional levels. Instead of a vial with a bubble inside, a laser level emits a visible laser beam that is used to make sure that an object is straight.
 Once you have decided to opt for paving your garden you need to make a choice of the paving materials. This is a little daunting task, as you need to have some knowledge and information on the different paving materials available so that you can choose the paver accordingly. The apt paving material chosen can add texture, color, and a specific pattern to a garden. The paving material, which is commonly used, fall into two categories, composite material, and quarried stones.
 Stone:
 Concrete:
 Limestone:
 Granite:
 Alyssa Moylan is an ordinary woman from Australia, a writer by day and a reader by night. She loves to be enlightened people about enhancing garden beauty using
  How to Plant Tulip Bulbs
 7 Nontoxic Flea Control Tips
 RSS Feed
